Create Delegated Token
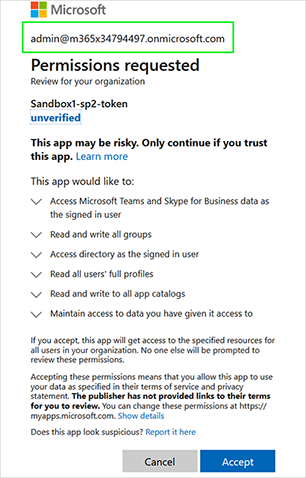
You can secure the connection with the customer M365 platform using a Delegated Token by sending an email to the customer Service account including a link to trigger the Invitation wizard. The Delegated Token connection requires the customer to provide consent for the following Microsoft Graph Delegated permissions:
|
■
|
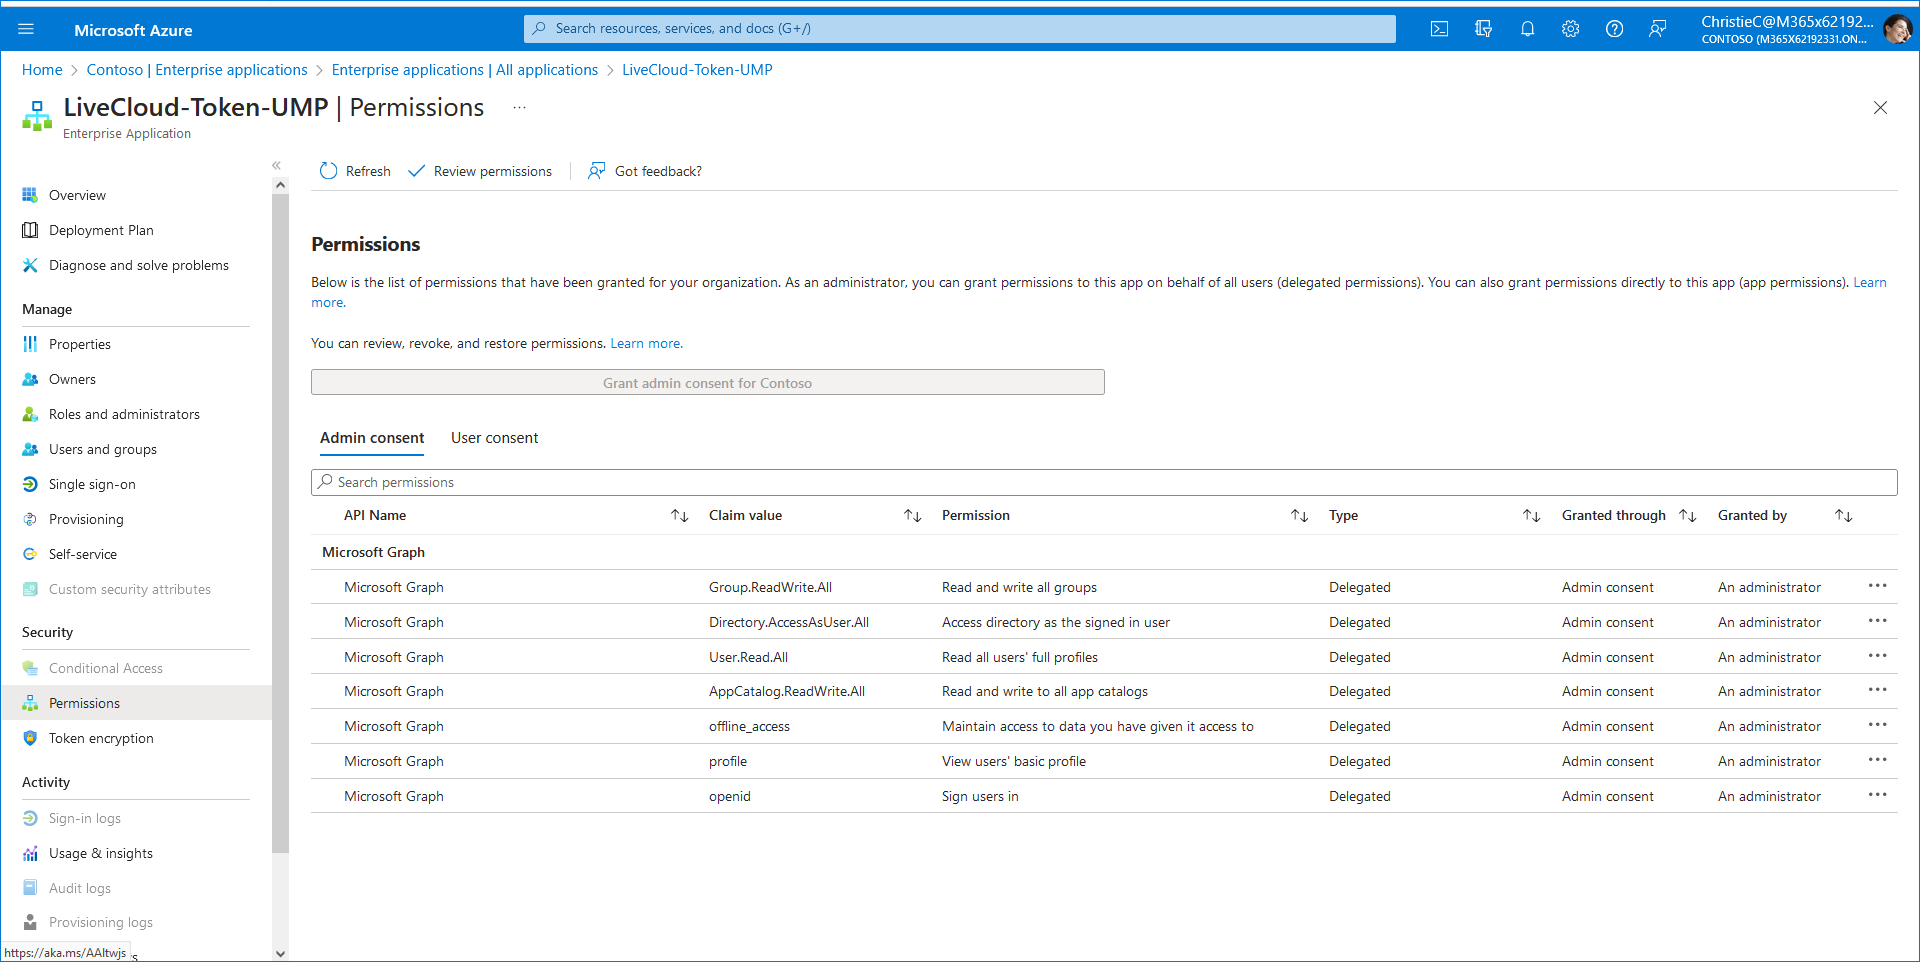
Read and Write All Groups: Allows the app to list groups, and to read their properties and all group memberships on behalf of the signed-in user. Also allows the app to read calendar, conversations, files, and other group content for all groups the signed-in user can access. This permission is required for Life Cycle Management in the Live Platform Service portal. This functionality enables you to assign configuration templates to Azure Security groups. The configuration includes for example, the assignment of phone ranges to automatically assign to tenant users and configuration of OnlineVoiceRouting policies. |
|
■
|
Access directory as the signed in user: Allows the app to have the same access to information in the directory as the signed-in use. This permission allows Live Platform to access the tenant M365 Active Directory platform. It allows Live Platform to impersonate the signed-in user, accessing the Active directory data as if the user themselves were making the request. |
|
■
|
Read all users' full profiles: Allows the app to read the full set of profile properties, reports, and managers of other users in your organization, on behalf of the signed-in user. This permission is required to update user attributes like Department, Office location etc. |
|
■
|
Read and write to all app catalogs: Allows the app to create, read, update, and delete apps in the app catalogs. This permission is required for managing Teams PowerShell cmdlets which run commands on the tenant M365 Active Directory. |
|
■
|
Maintain access to data you have given it access to (offline_access): Allows the app to see and update the data you gave it access to, even when users are not currently using the app. This does not give the app any additional permissions. |
|
1.
|
Login to the customer Live Platform Operation Center with your Live Platform admin user. |
|
2.
|
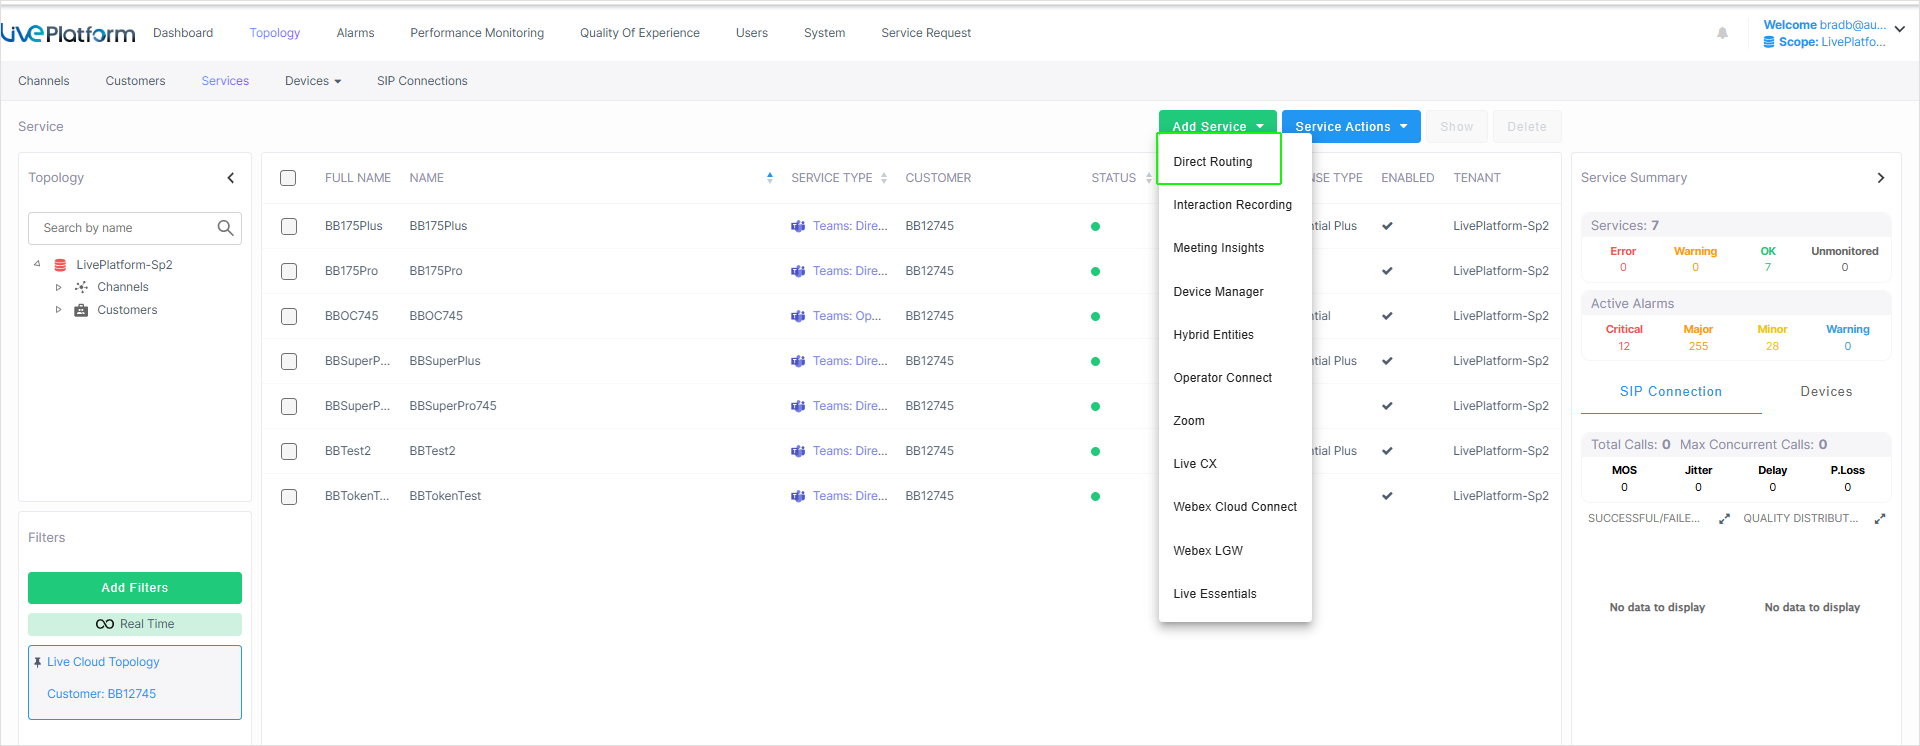
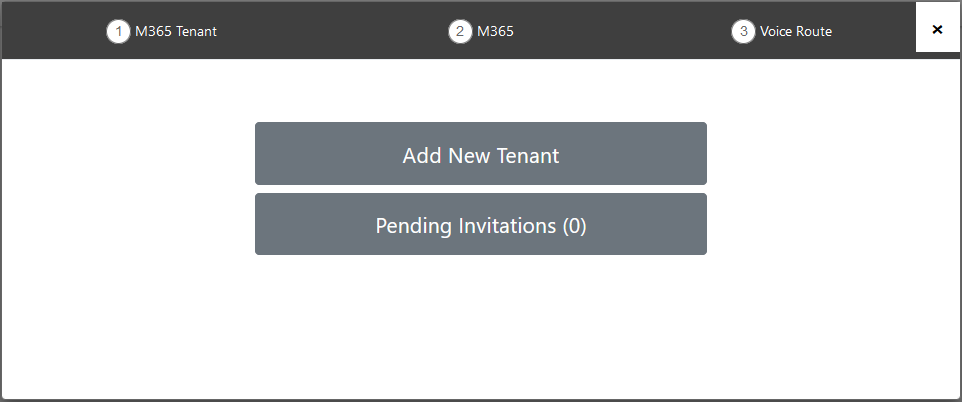
In the Services page, from the Add Service drop-down, select Direct Routing. |
|
3.
|
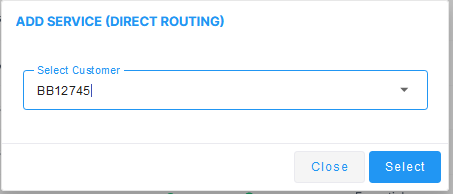
Choose the relevant customer and then click Select. |
|
6.
|
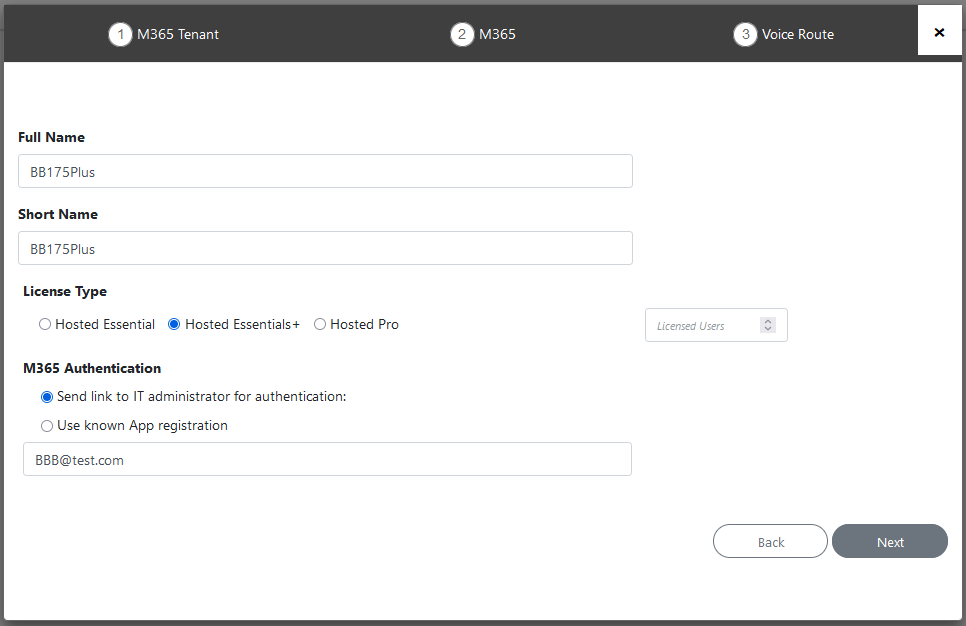
Enter Full Name of Service – Free Text. |
|
7.
|
Enter a unique Short Name for the service complying with the following rules: |
|
●
|
The string should be 3-15 characters long |
|
●
|
The following characters cannot be used: \ / : * ? " < > |audit |
|
●
|
The string can contain letters (lower/UPPER case), numbers and special characters, however cannot contain the dot (.) blank spaces, Underscore "_" or hyphen "-". |
|
●
|
The string should be a unique name per service |
|
8.
|
Select the relevant license type Hosted Essentials+ or Hosted Pro. |
|
9.
|
Enter the number of licensed users. A maximum of 500 users can be configured per service. |
|
10.
|
Select option Send link to IT administrator for authentication,enter the email address of either your Live Platform M365 account or the customer M365 Global admin user Principal Name (UPN) account, and then click Next. A email confirmation dialog is displayed; close it. An email link similar to the following is sent to the designated account. When Click here to activate your tenant is clicked, the Invitation wizard is displayed. |

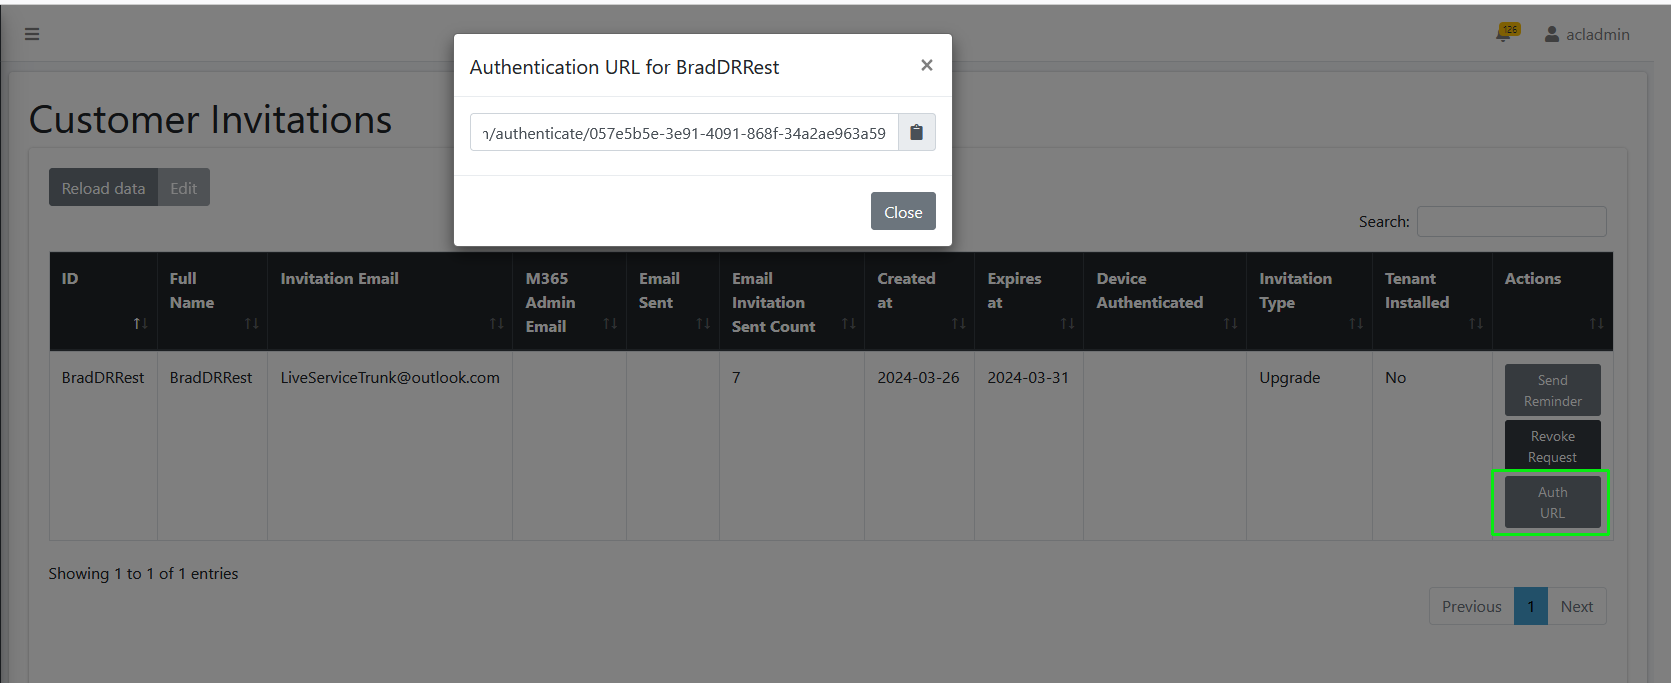
If mail has not been received, open the Multitenant interface and navigate to Security > Customer Invitations. Search for the relevant token and verify that the 'Email Sent' field is set to true (see Pending Invitations). You can also initiate the Token Invitation wizard by clicking the AuthURL link (see below), and then copy the URL and paste in Web browser. In addition, check the email settings (see Configuring Email Settings).
|
11.
|
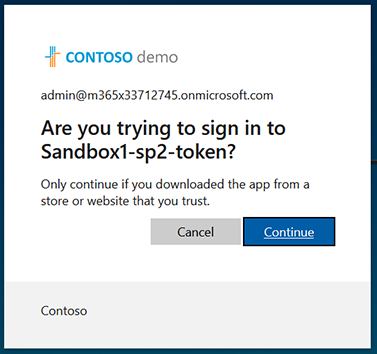
Click the link to the Token Invitation wizard sent in the mail as shown in the example above. The Invitation Wizard Welcome screen is displayed. |

|
12.
|
Select option Use Device Token. |
|
13.
|
In the User Device Token field, enter the credentials of the Service account, and then click Start authentication. |
|
14.
|
Do one of the following: |
|
●
|
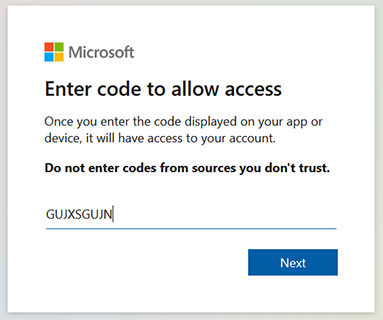
Copy the code and then click the URL link below it. |
|
●
|
Click Copy code and open page in new tab. |
|
15.
|
Click Next or enter code if you clicked the ....device/login link above. |

|
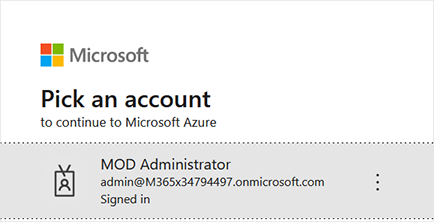
16.
|
Enter credentials of the Service account of the M365 tenant. |
|
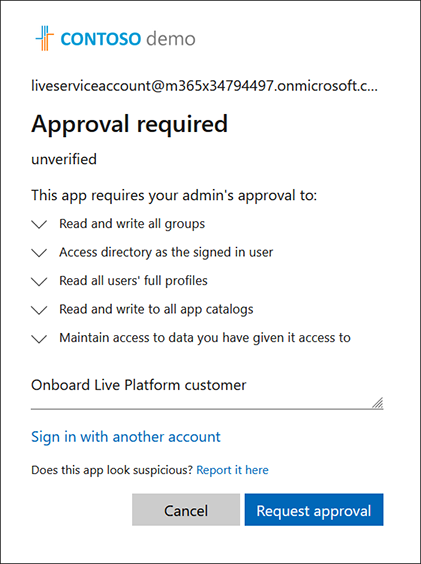
18.
|
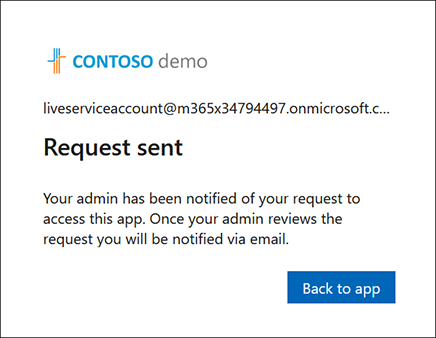
Enter the reason for Sign-in request and then click Request approval. An information message is displayed informing that a Request has been sent to the customer tenant Admin Consent Reviewer account defined in Setup Admin Consent Workflow Permissions. |
|
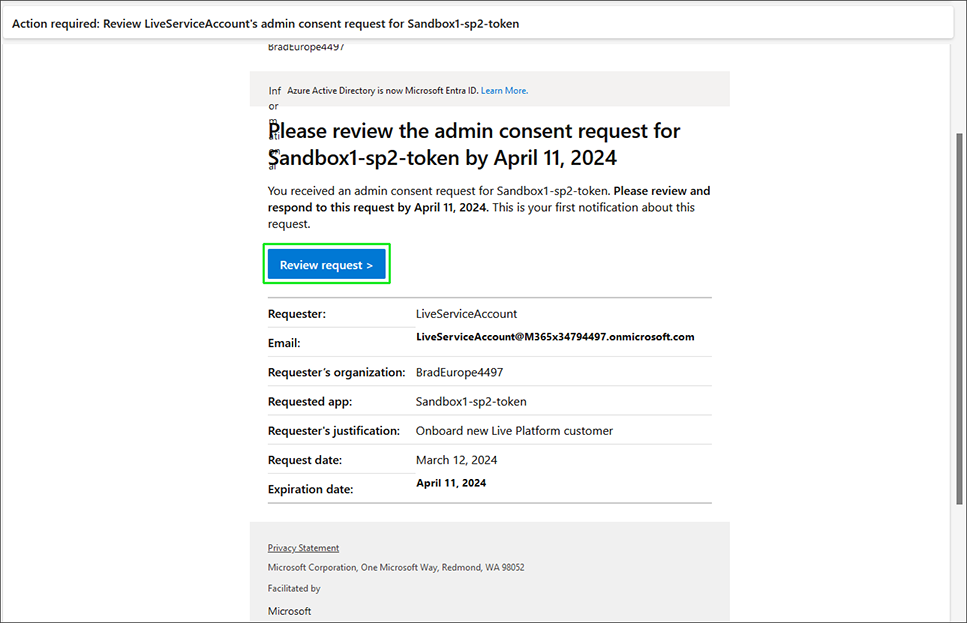
19.
|
Open the email of the Admin Consent Reviewer account. See an example mail message below. |
|
20.
|
Click Review request. |
|
21.
|
Enter the credentials of the Admin Consent Reviewer account. |
|
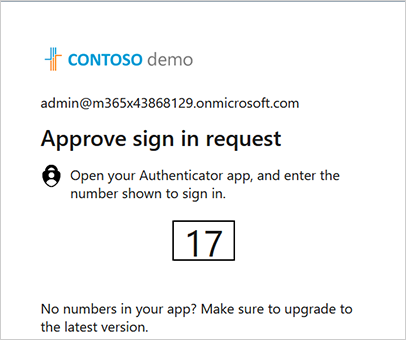
22.
|
You will be prompted to authenticate your account using Microsoft Authenticator. A screen similar to the following is displayed; complete the authentication process. |
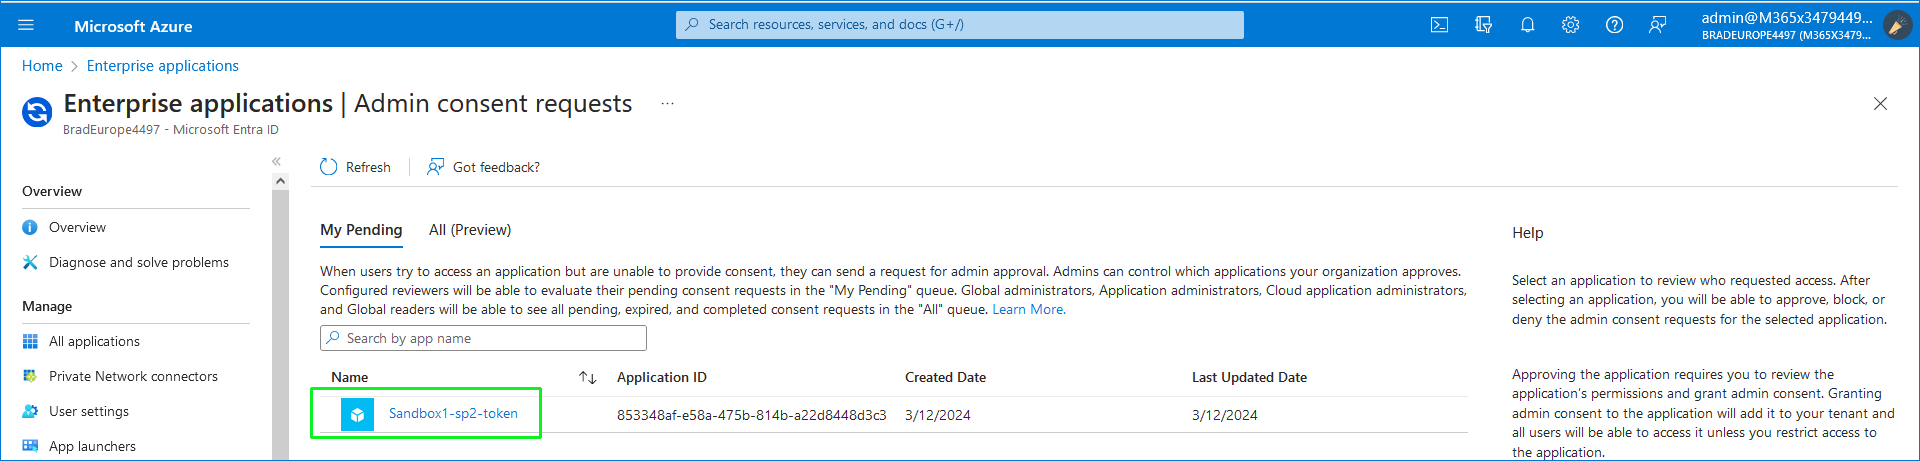
You are logged in to the Azure portal of the customer tenant Admin Consent Reviewer account displaying the pending Admin Consent request for the Token registration.
|
24.
|
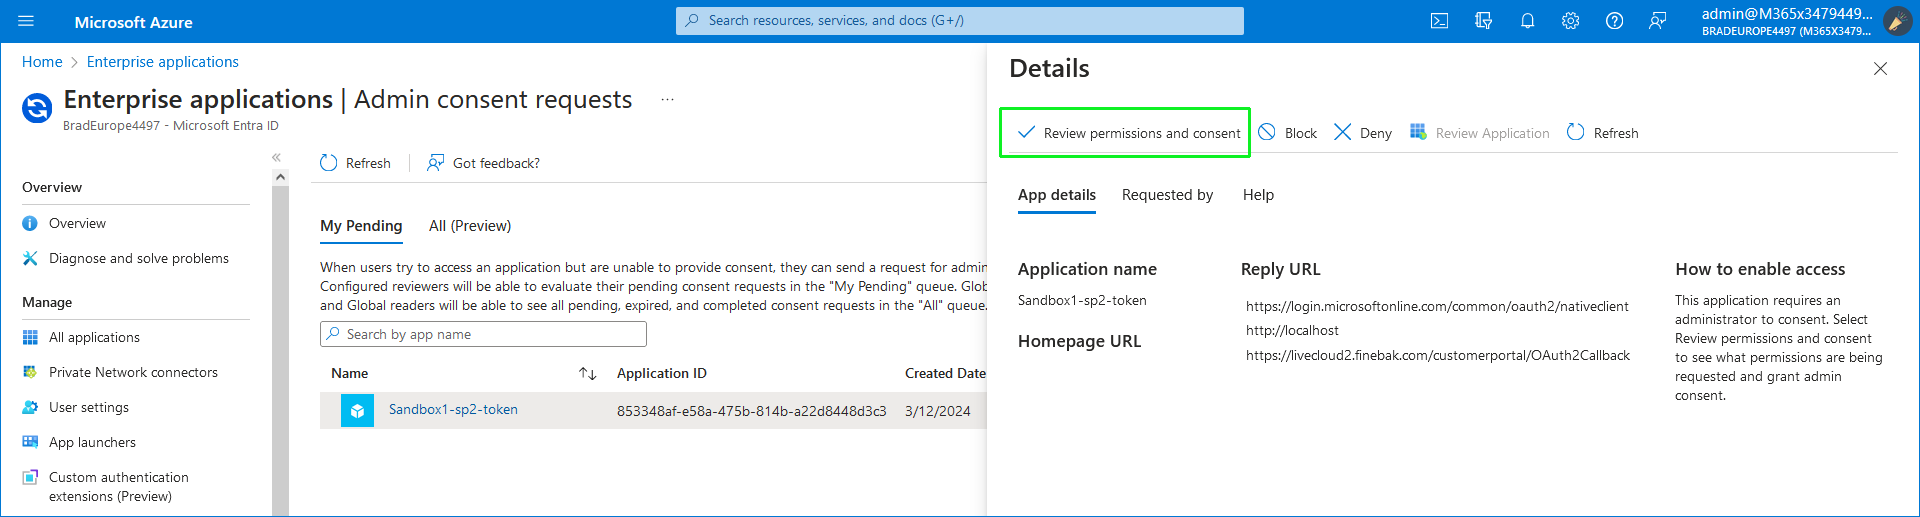
Click Review permissions and consent. |
|
25.
|
Enter the credentials of the Admin Consent Reviewer account, and then click Accept. |
|
26.
|
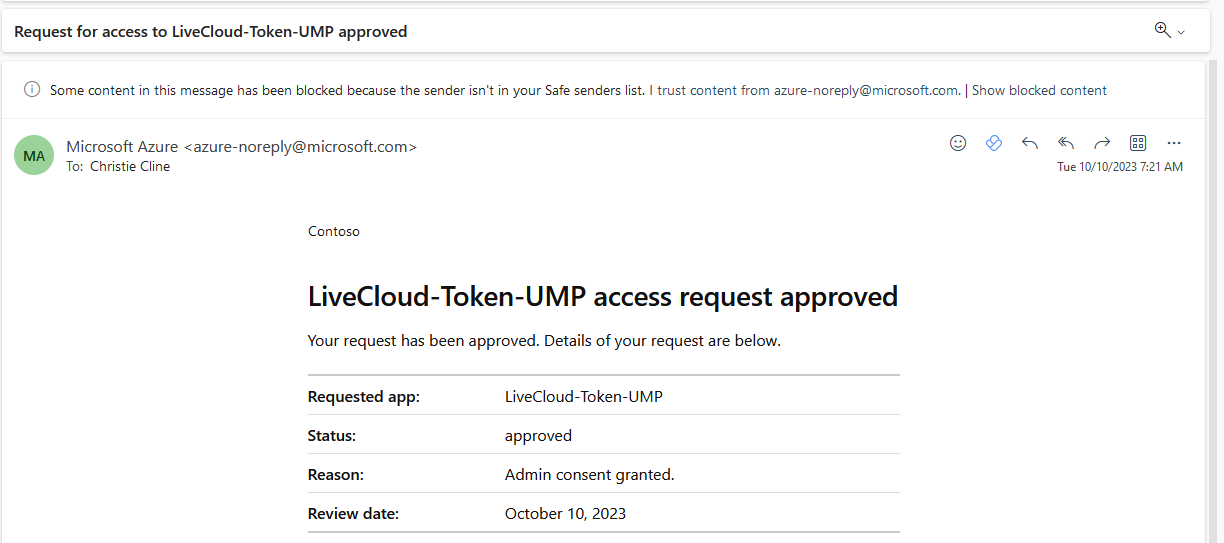
Once approved, all entries under My Pending are removed and a confirmation message is displayed. |


In addition, An email confirmation message similar to the following is received by the customer administrator.
|
27.
|
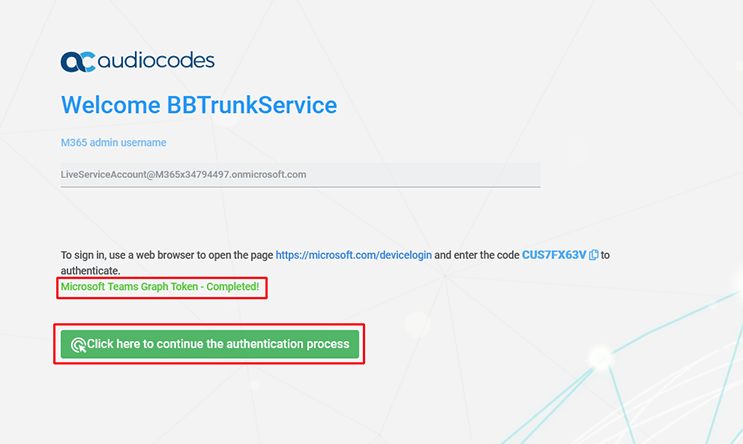
Return to the Token wizard screen. A confirmation message is displayed that the Token Invitation wizard has successfully acquired a token. |
|
28.
|
If this is the first time that you are connecting to your customer tenant, click the click here to continue the authentication process link. |
|
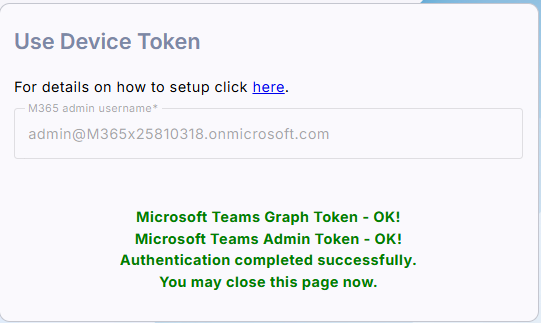
29.
|
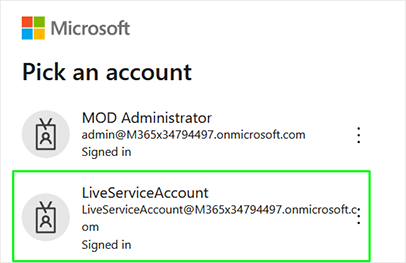
Enter the credentials of the Service account. A confirmation message is displayed indicating that the Token authentication process has successfully completed. |
|
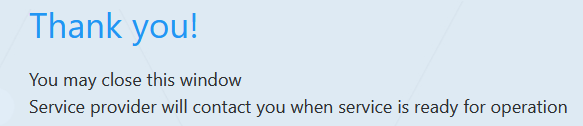
30.
|
Close the browser tab; the Tenant Activation page appears with an additional confirmation message. |
|
31.
|
Close the Tenant Activation page. |
|
32.
|
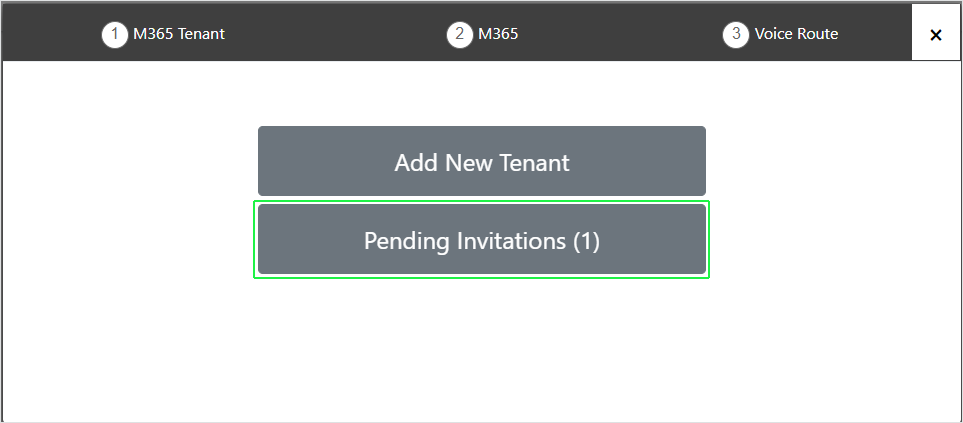
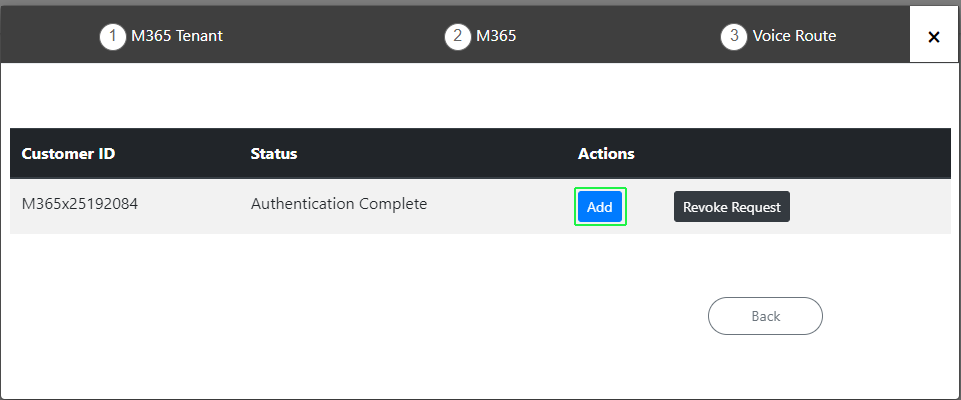
Reopen the Onboarding wizard; in the Services page, from the Add Service drop-down, select Direct Routing, select your customer, and then click Pending Invitations to confirm that the Authentication process is complete. Verify that Status is shown as Authentication Complete (see Pending Requests). You can then click Add to resume the Onboarding (see Onboarding with Hosted Essentials + or Onboarding with Hosted Pro). Note, you can also open the Multitenant interface and navigate to Monitoring > Service > Pending Invitations. Search for the relevant token and verify that the 'Device Authenticated' field is set to true (see Pending Invitations). |
|
33.
|
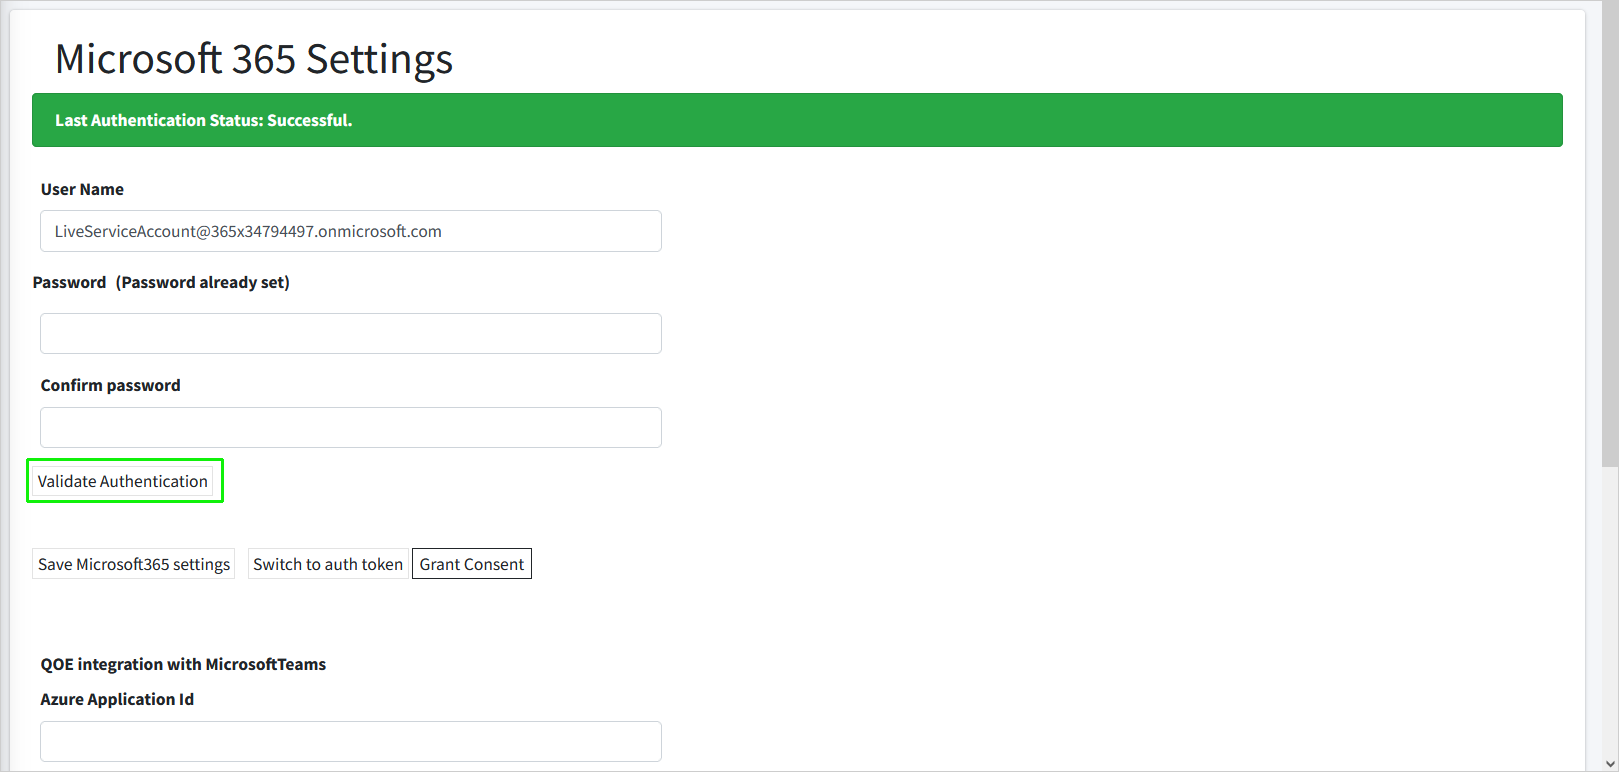
Login to the customer Service account on the Azure portal and open the newly created Token registration (Enterprise Applications > <Token-Registration-Name>). Note the newly added permissions for the new Enterprise application. In the Navigation pane, select Permissions to view the permissions for the new Enterprise application. |
|
34.
|
Upon the completion of the Onboarding process, you can login to the Live Platform portal (see Accessing the Customer Portal (Direct Routing), and then open the M365 Settings page (see Securing Microsoft 365 Service Provider Access). Notice that the Service account credentials are displayed. You can click Validate Authentication to test the Token connection. A confirmation message is displayed at the top of the screen. |